Frequently Asked Questions
How can I install BlurXTerminator AI2?
https://www.rc-astro.com/BlurXTerminator/PixInsight-AI2Complete the installation by the normal PixInsight update procedure: run Resources -> Updates -> Check for Updates, or simply quit and re-start PixInsight.
BlurXTerminator 2.0/AI4 error in PixInsight: MLLoad() could not load tensorflow graph
An error such as the following can occur when running BlurXTerminator version 2.0 with AI4:
*** Error: ERROR: MLLoad() could not load tensorflow graph. Error 3: Converting GraphDef to Graph has failed.
This error indicates that the tensorflow.dll file in PixInsight’s installation on your computer is out of date. There are two solutions:
- Update or re-install PixInsight, which includes a recent version of the tensorflow.dll file in its distribution.
- Download version 2.10 of the file directly:
- If you are using GPU acceleration, use the link provided in these instructions.
- If you are not using GPU acceleration, download the file from the TensorFlow project using this link.
- Unzip the download, find the tensorflow.dll file within, and place this in PixInsight’s bin directory (C:\Program Files\PixInsight\bin), overwriting the outdated version that is there.
Enabling 24-bit lookup tables in PixInsight
PixInsight uses “lookup tables” to define how colors in an image are displayed on the screen. By default these tables have 16-bit precision for fast display of images. This works well for many images, but can create apparent posterization in some images, especially those that have had noise reduction applied such as with NoiseXTerminator.
If you see posterization (color banding) after running NoiseXTerminator, make sure that 24-bit lookup tables are enabled in PixInsight.

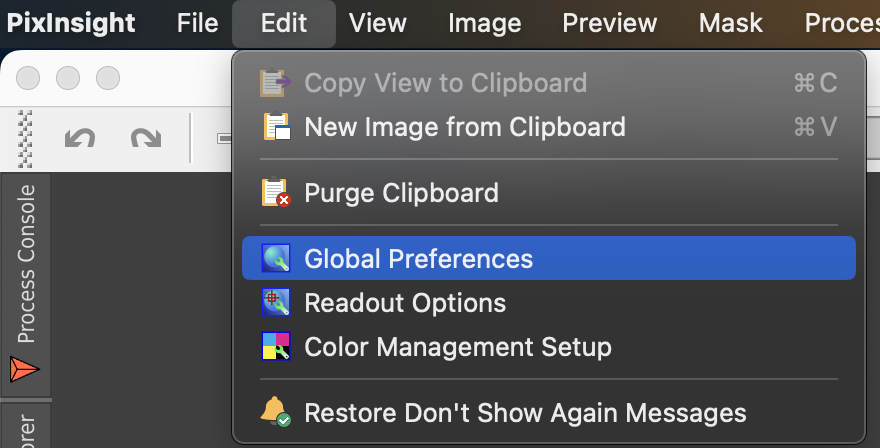
To configure PixInsight to enable 24-bit lookup tables by default, run Edit -> Global Preferences:
Navigate to the Miscellaneous Image Window Settings tab and turn on the checkbox for “Use 24-bit Screen Transfer Function LUTs by default:”
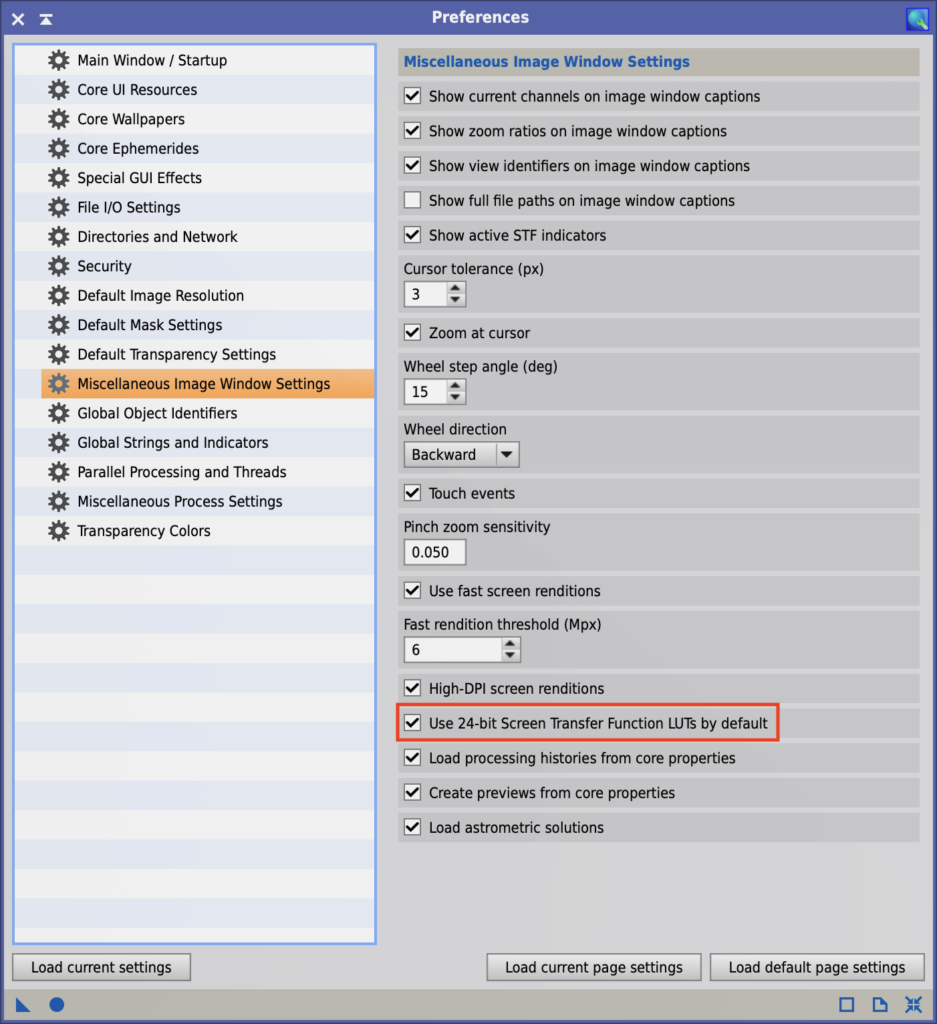
To save this change, you must click on the “Apply Global” button at the bottom of this window:

For full information on how lookup tables work in PixInsight, see the definitive article from the PixInsight team.
Resource Exhausted, OOM (Out of Memory) TensorFlow error in StarXTerminator
If you see an error like this when running StarXTerminator:
RESOURCE_EXHAUSTED: OOM when allocating tensor…
This indicates that your GPU lacks sufficient memory to run the full version of StarXTerminator AI11. At least 6GB of GPU memory are required to run the full version. Note that this is a GPU memory requirement. CPU memory is separate from GPU memory.
The “lite” versions of AI11 use about 4x less memory. Use the Select AI button to choose one of the “lite” versions of AI11. The differences between the AI11 versions are covered here.
CUDA acceleration no longer works after updating PixInsight
When you install an update to PixInsight, it removes all files in its “bin” directory and replaces them with updated files. If you had performed the necessary steps to enable GPU acceleration, this means that the tensorflow.dll file (tensorflow.so on Linux) will also have been replaced with the default CPU-only version distributed with PixInsight.
To restore GPU acceleration, you’ll need to repeat the “Download and install the GPU-enabled TensorFlow library” step of the instructions.
Are there any package or bundle deals or prices? How do discounts work?
Currently there are no “packages” or “bundles” as such, but discounts are automatically applied as follows. Please note that this discount system may change at any time without notice.
Once you own a permanent license to any RC Astro tool, licenses for any other tools can be purchased at a discount. Currently this discount is $10 off the full price of each tool. This discount will apply whether you purchase multiple licenses at the same time or at different times as long as your license(s) are all associated with the same RC Astro account (email address).
If you previously purchased licenses using a different email address, submit a support ticket letting us know you would like to merge your accounts. Be sure to let us know in the support ticket what those other email address(es) are. You may be required to send an email from the other address(es) for verification.
Will there be a Photoshop, Affinity Photo, or stand-alone version of BlurXTerminator?
There are no plans to make a version of BlurXTerminator for Photoshop. Deconvolution is not just any sharpening algorithm: it has a precise mathematical definition. It requires linear image data with minimal processing for optimal results or indeed to even be called deconvolution. Linear image processing is difficult to achieve using Photoshop.
In addition, the vast majority of serious astrophotographers moved away from using general photography applications like Photoshop even before the introduction of BlurXTerminator. A small independent software developer like RC Astro must carefully choose where to invest its time in order to create, maintain, and support high quality tools where they are most needed.
This likewise applies to the possibility of a stand-alone version of BlurXTerminator. A tremendous amount of infrastructure built into PixInsight, such as reading and writing myriad file types, performing various pre-processing steps, etc., would need to be re-implemented in a stand-alone app. This code would also need to be made completely cross-platform to support Windows, MacOS, and Linux. This heavy lifting is already done in PixInsight – quite elegantly in fact – and is leveraged heavily by BlurXTerminator. Reinventing these wheels is beyond the development resources available considering that the existing RC Astro tools must be maintained and continually improved, not to mention the need to devote time to completely new tools.
Why does StarXTerminator fail to remove stars?
These are the most common reasons for poor star removal performance:
- Optical aberrations (coma, field curvature, etc.) are too severe
- The image is excessively oversampled
- The image has been stretched using alternative stretching method(s) such as generalized hyperbolic stretch (GHS) or arcsinh
StarXTerminator is trained to recognized stars with a limited amount of optical aberrations such as coma. There is a limit, however. If you find that stars near the center are removed but stars near the corners are not, this is most likely the cause. You may be able to achieve better removal if the image is first processed with BlurXTerminator in the “correct only” mode, but even here there is a limit. The correct solution is to resolve the optical aberrations through better tuning of the optical system and/or better optics. Some systems may simply require cropping away the strongly aberrated portions.
For best results, run StarXTerminator (and BlurXTerminator) on images with stellar FWHM values less than 8 pixels, and use it early in the processing flow, before extensive stretching operations.
Stellar FWHM values between 3-4 pixels are adequately sampled, meaning that there is no resolution gain at higher values. Any image with FWHM values over 6 pixels can be safely down-sampled by a factor of two, using either in-camera pixel binning or a simple integer resize, without losing information. There are benefits to down-sampling oversampled images: image files will be 4x smaller, all processing will run ~4x faster, and the signal-to-noise ratio (SNR) of the image will be improved.
To provide a factor of two of margin, StarXTerminator and other RC Astro tools are designed to work well up to 8 pixels FWHM. Above this, performance will suffer.
As mentioned in the usage notes, StarXTerminator is best used early in processing, prior to extensive stretching, especially if using stretch methods other than a simple mid-tones transfer function (MTF).
Error computing NN outputs, strange patches of random pixels, or PixInsight crashing on MacOS
When running BlurXTerminator, NoiseXTerminator, or StarXTerminator on MacOS, in rare cases you might see the following error message:
*** Error: In ProcessTile Error computing NN outputs.
In some cases, the tool will run with no errors, but will produce patches of random pixels scattered around the image. In other cases, PixInsight may simply crash.
Update (11 October 2023): It appears that this is due to a MacOS bug that may have been corrected in MacOS 14 (Sonoma). Try upgrading your Mac to this version of MacOS.
We’re currently working diligently to find the root cause of this obscure malfunction that only affects some Apple silicon Macs. In the meantime, there is fortunately a workaround. This will not actually correct the underlying issue, but will allow BlurXTerminator, StarXTerminator, and NoiseXTerminator to run without errors. This involves changing the AI definition from the “mlpackage” format to the less-accurate “mlmodel” format, which will sacrifice precision and may result in some posterization. Note that the procedure below shows the workaround for BlurXTerminator, but the same change applies to StarXTerminator and NoiseXTerminator. The key is to change mlpackage to mlmodel in the instance source code.
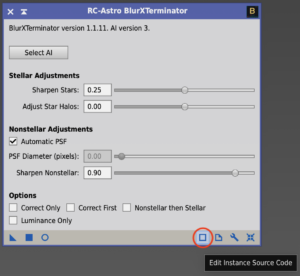
Click the “edit instance source code” button at the bottom of the window:
Edit the P.ai_file parameter, replacing mlpackage with mlmodel. It should look like this:
P.ai_file = "BlurXTerminator.4.mlmodel";
Or, if you are using AI2:
P.ai_file = "BlurXTerminator.2.mlmodel";
Click the green checkbox to save this edit:
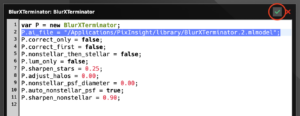
The tool should now run without errors. Note that using the “mlmodel” format instead of “mlpackage” results in lower numerical precision. This won’t affect most images, but in very bright areas there may be some posterization.
What is the right order in which to apply RC Astro tools and other processing steps?
At RC Astro, we enthusiastically believe that an important part of the joy of astrophotography is learning for yourself the best order in which to apply the various processing steps that lead to a finished image. As a result, we do not prescribe workflows. To do so would replace your personal voyage of discovery and learning with cookbook answers: you might know what to do, but you wouldn’t know why. Moreover, dictating a “proper” order of processing steps would prevent conscious thought and innovation on your part – one workflow may work well for a particular type of astrophotograph taken with a particular class of instrumentation, but it might not work well for all images.
The story of astrophotography is one of constant innovation, and it is far from over. Many of the techniques and workflows of yesterday have become obsolete as new and better methods have been invented – invented by individual astrophotographers closely inspecting what is happening to their data at each step, and trying to dream up a better way.
Instead of cookie-cutter answers, we try to give insight into why applying one tool before or after another might be good or bad practice. As an example, we can confidently state that noise reduction (of any sort) should not be applied before deconvolution (of any sort). Noise reduction tends to destroy the low-contrast information at fine scales that deconvolution needs to function well, and it gives the deconvolution algorithm a false sense of the signal-to-noise ratio in the image. Applying deconvolution after noise reduction may produce an image that “looks sharper,” but the accuracy of those sharper details would be highly questionable.
Beyond general guidelines such as this lies a wide vista of possibilities. Experiment for yourself. Study, learn, and experiment some more. Inspect the results of a particular workflow and ask yourself why that workflow produced that result, or why one processing sequence worked better than another. Think critically about the results you are seeing. It is through exploration like this that you will eventually master this fascinating avocation, and perhaps one day come up with a new approach that no one else would have thought of.
How do I remove or reset my license activation on one computer to activate on a new computer?
Permanent licenses may be activated on up to three computers provided that you are the user of the tool on all three. Trial licenses may be activated on up to two machines. If you have activated the maximum number of computers, yet you need to activate on another because one of the machines has been replaced, you can reset your activations from your account dashboard.
Navigate to your account page. For each tool you will see the number of current activations. If this is greater than zero, you will also see a Reset button. Click that to reset all of your activations for that tool. You will need to re-activate the tool on each machine currently in use.
Why don’t I see all of my licenses in my account?
If you purchased license(s) for RC Astro tools in the past using a different email address, they won’t appear in your account dashboard. This can be easily resolved: just submit a support ticket letting us know the old address, and we’ll get it done. We may require an email to be sent from the old address for verification.
Plugin says validation requires computer to be online, but my computer is online – what’s going on?
License key validation requires an internet connection to communicate with the RC Astro license servers. Make sure your computer is connected to the internet and that you can browse to the RC Astro site. Very infrequently the license servers are offline for maintenance. This usually lasts just a few minutes.
If the plugin still can’t seem to connect and you are on a Windows machine, the Windows Defender Firewall may be blocking access. To allow it to connect, you’ll need to allow Photoshop or PixInsight to make connections through the firewall.
Here’s a guide for Windows 10: https://pureinfotech.com/allow-apps-firewall-windows-10/
And another for Windows 11: https://www.technipages.com/block-unblock-programs-in-windows-firewall/
On Linux and MacOS machines, make sure there isn’t some third-party software blocking access to the internet.
You may also need to make sure access is not being blocked by your network’s firewall. This may involve contacting your IT department if at work, or checking router/firewall settings if at home.
SSL/handshake/schannel errors in PixInsight

If you see this error while trying to run “Check for Updates” in PixInsight, there is some aspect of your internet connection configuration blocking access to the RC Astro content delivery site, rc-astro-cdn.com. It could be a firewall, a proxy, virus/malware protection software, or your Internet Service Provider.
If it is your ISP, you may need to contact them to unblock access to the site: check their website for instructions.
Also check your operating system’s network configuration: your machine may have a problem with secure HTTP connections.
Why did my trial license expire immediately?
This happens when the licensing system detects that multiple trial licenses have been requested, perhaps using different email addresses. It can also happen if you used someone else’s trial or permanent license key for any tool at any time. As a friendly reminder, you agreed to some terms and conditions, such as:
- Licenses are valid only for the original user and are not transferrable.
- You will not divulge nor share your trial nor permanent license key(s) with anyone, realizing that this would violate this license agreement and deprive the creator(s) of this software of fair compensation for their hard work. Your license key(s) are issued to you, and may be used only by you and no one else.
- You will not attempt to defeat, bypass, nor otherwise circumvent the licensing and registration system built into this software and/or this web site. This includes but is not limited to:
- reverse engineering the license code system,
- forging or creating software to forge license keys for yourself or others,
- extending or attempting to extend the free trial license period beyond the time granted by the licensing system, and/or
- hacking this web site and/or the software.
The RC Astro team works very hard to bring high-quality, effective tools to the astrophotography community. Please respect these terms so that we can spend our time on making more and better tools, not on other things.
The trial period provides a generous amount of time during which you can evaluate the usefulness of a tool. Once this time is up, should you find the tool worthwhile, please purchase a permanent license to continue using it.
You may submit a support ticket to address any concerns. Your account will be carefully reviewed. If an error has been made, it will be addressed promptly.
RC Astro tools disappeared from PixInsight or won’t update
Occasionally, PixInsight plug-in modules will be removed by third-party anti-virus, anti-malware, or other software. If your RC Astro tools seemed to install and work fine but then stop or disappear from the Process menu, or if you are not receiving updates to the latest versions of tools, do the following:
- First, try simply re-installing the tools:
- Run Process -> Modules -> Install Modules
- Click Search
- If modules are found to install, click OK, then Install
- If this doesn’t work then:
- For PixInsight 1.8.9-2 or later:
- In PixInsight, run Resources -> Updates -> Reset Updates. Click the “Yes” button in the “Are you sure?” window.
- Quit PixInsight. The update system will reset updates as requested, and then restart PixInsight automatically, and report that the update process (resetting the updates) was successful. Click the “OK” button in this window.
- After a moments, PixInsight should report that you have a number of updates to install. Click that window. In the “Select and Download Updates” window that results, click the “Apply” button.
- Once the downloads are complete, click the “OK” button, then quit PixInsight to install the updates.
- For PixInsight 1.8.9-1:
- Delete the “updates.xri” file from PixInsight’s main application directory
- Re-start PixInsight
- This will force a fresh download/installation of all updates to your PixInsight installation, including any RC Astro tools
- For PixInsight 1.8.9-2 or later:
In rare cases, the PixInsight installation itself can become corrupted. If none of the above works, you may need to re-install PixInsight from scratch. Contact support if you want to troubleshoot further before taking this step.
Where can I find BlurXTerminator documentation?
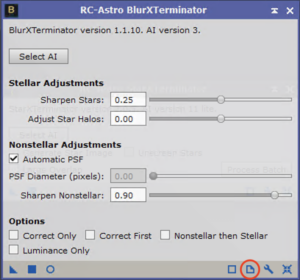
Full documentation for BlurXTerminator, including the theory of operation as well as detailed notes on usage and workflow considerations can be found from directly within the tool in PixInsight. Click the little dog-eared-sheet-of-paper icon at the bottom of the BlurXTerminator window to bring it up.
Errors installing AI-powered plug-ins
If you see the following errors when installing AI-powered RC Astro tools in PixInsight, it could be that your CPU is not capable of performing neural network computations:
C:/Program Files/PixInsight/bin/BlurXTerminator-pxm.dll
<* failed *>
*** PixInsight API Error: Module: C:/Program Files/PixInsight/bin/BlurXTerminator-pxm.dll
Cannot load library C:\Program Files\PixInsight\bin\BlurXTerminator-pxm.dll: A dynamic link library (DLL) initialization routine failed.: Module load error
In the Windows Event Viewer, you might find error messages like this:
Faulting application name: PixInsight.exe, version: 1.8.9.1, time stamp: 0x6284c71b
Faulting module name: tensorflow.dll, version: 0.0.0.0, time stamp: 0x61118c31 Exception code: 0xc0000005 Fault offset: 0x00000000056b306c
Faulting process ID: 0x0x1AA0 Faulting application start time: 0x0x1D979063A265EBD Faulting application path: C:\Program Files\PixInsight\bin\PixInsight.exe
Faulting module path: C:\Program Files\PixInsight\bin\tensorflow.dll
When launching Photoshop-based AI tools, you might see an error like this:
Could not load C:\Program Files\Rc-Astro\StarXTerminator\tensorflow.dll
All of these error messages tend to indicate a CPU that is not suited to performing neural network computations.
Neural networks are an advanced technology that require a modern CPU. Specifically, the CPU must support AVX instructions. CPUs dating before about 2012, and even some modern CPUs for low-power or mobile applications lack this capability. Intel “Celeron” processors in particular lack this support. This is a limitation that doesn’t just apply to RC Astro tools – other AI-based tools will likely not run at all on these CPUs.
How do I activate my license in PixInsight?
If you have a new license key for one of the RC Astro tools for PixInsight, activating it is easy. The process is the same whether you are activating a trial or permanent license. If you had a trial license and have now purchased a permanent license (thanks!), updating your license key uses the same process.
There is no need to un-install or remove the “trial version” of the tool in order to upgrade to a permanent license. There is no difference between the trial and permanent versions of the tool – only the license key is different.
Click the small “wrench” icon at the bottom of the tool window to bring up the license window.
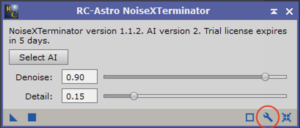
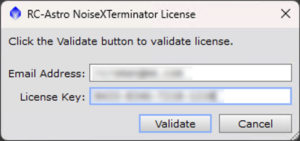
Enter your license key in the License Key box, then click the Validate button.
After your license is validated, you should see a message that you are now licensed.
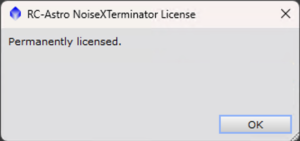
In the case of a trial license, you will be shown a message stating how many days are left in the trial period.
Click the OK button, and you’re all set.