
GradientXTerminator Tutorials & Manual
Video tutorial
Nick from AstroExploring has a very good YouTube video on how to use GradientXTerminator. Thanks, Nick!
Step-by-step tutorial
The following is a brief tutorial on how to use GradientXTerminator. You can use these same steps on your own image, or download the example used in this tutorial. For complete instructions on how to use GradientXTerminator, scroll down for the full manual. Note: these steps are shown using a Windows computer, but they should be nearly identical for the MacOS version of the plug-in.
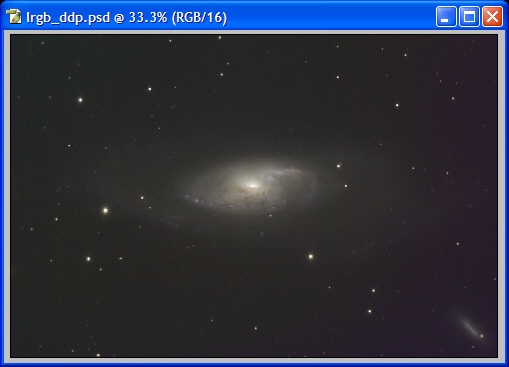
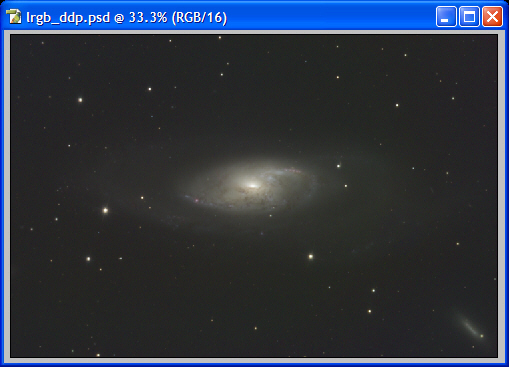
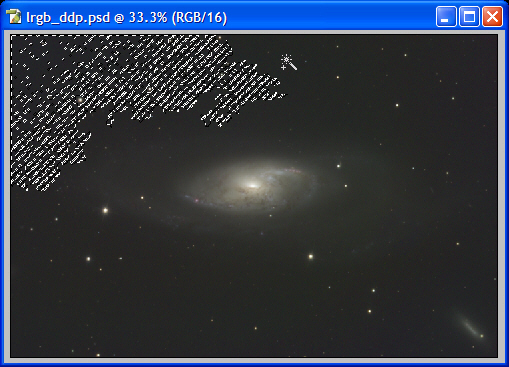
Open the image in Photoshop:
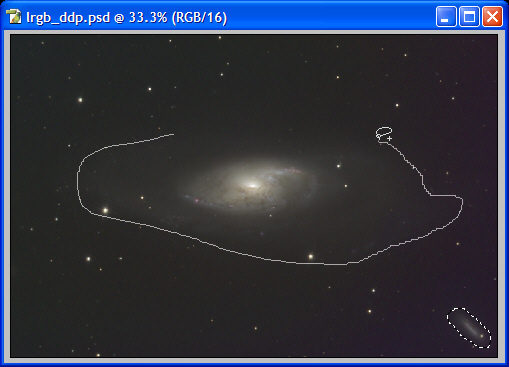
The first step is to do a rough correction of the large-scale gradients in the color channels. Start by using the Lasso tool to select the two galaxies in the image. At this stage, don’t worry too much about making sure no parts of the galaxies are selected; just make sure you get most of them. Use the Shift and Alt keys to add or subtract areas to the selection.
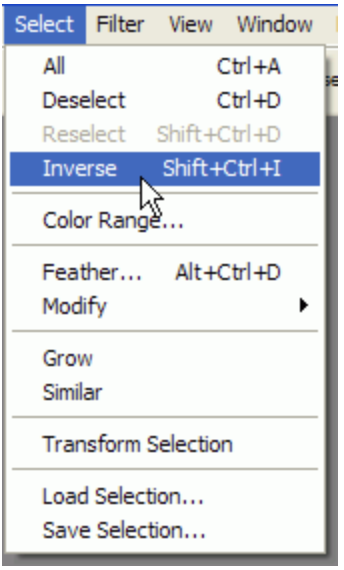
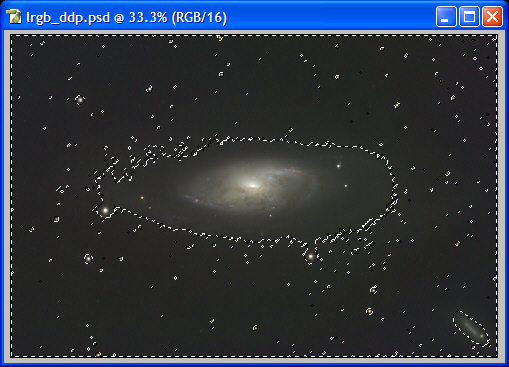
We want the background selected, not the galaxies. So invert the selection you just made:
At this point you should have something like this:
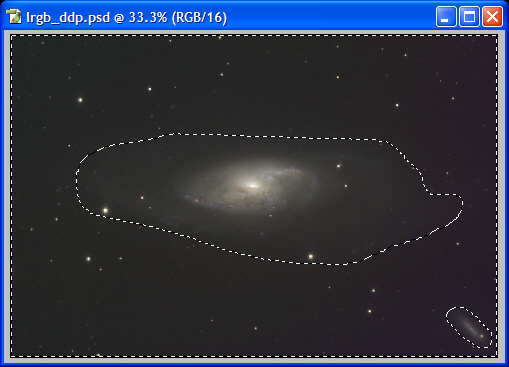
The selected portion of the image is what GradientXTerminator will look at to develop a model of the background gradients. Anything not selected will be ignored as far as this model is concerned, but these areas will be corrected based on the surrounding areas. There is no need to feather the selection.
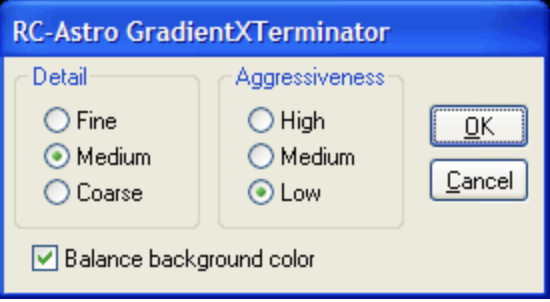
Now invoke the GradientXTerminator filter:
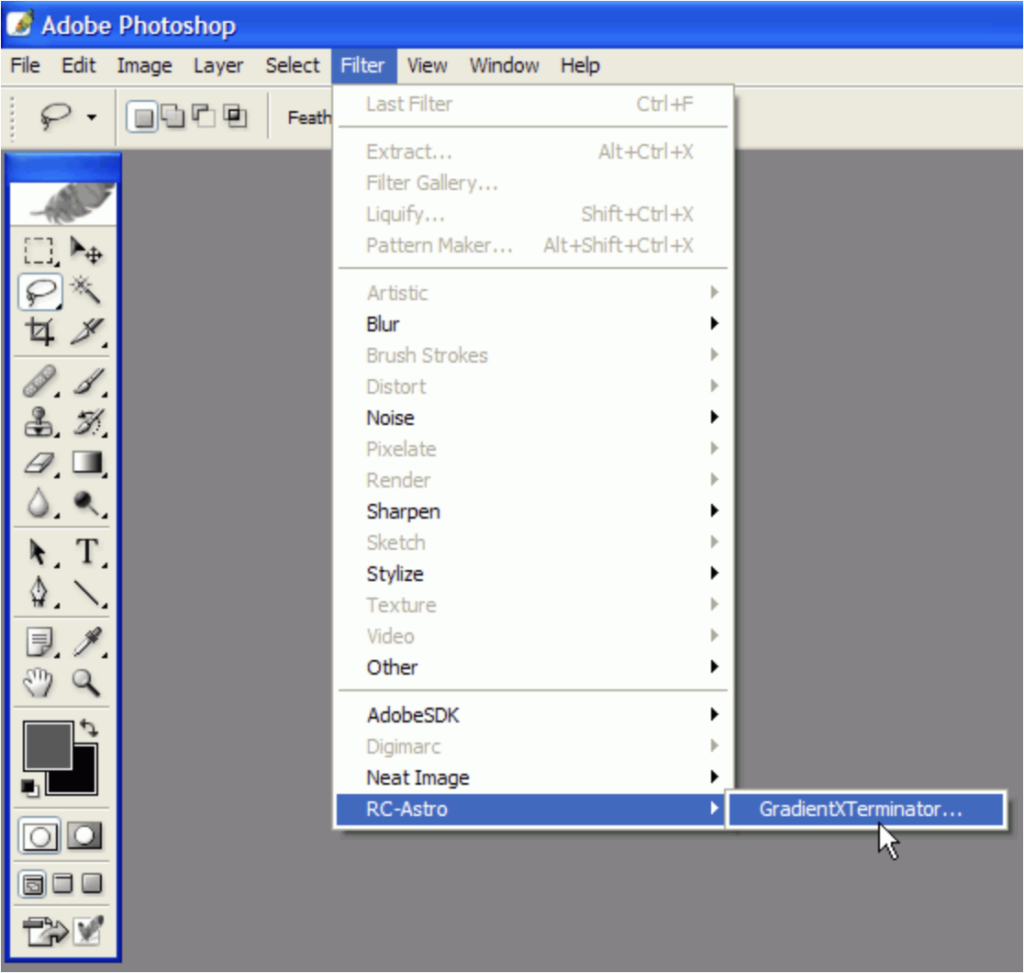
For this first gross correction, set the Detail to Medium, and the Aggressiveness to Low. Check “Balance background color” option if it is not checked. (This can normally be left on always.)
Run the filter. In a few seconds, you should see something like the following:
Note that the gradients have mostly been corrected, but there is still some residual color in the background. The point of the above initial correction was to make the background more easy to select for a subsequent, more detailed correction. Setting the Aggressiveness to Low ensures that only very large-scale gradients will be corrected, reducing the chance that a local feature, such as a faint arm of the galaxy, will be flattened by the filter.
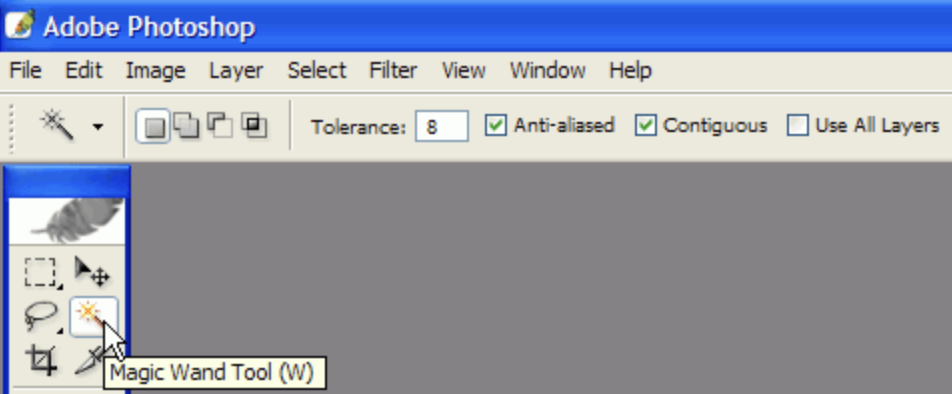
Now we’ll do a more detailed correction to fully flatten the background. Choose the Magic Wand tool in Photoshop. Set the tolerance to between 5 and 10, and make sure the “Contiguous” check box is selected.
Click on an area of the background. This may select the whole background nicely, or you may end up with just a part of the background selected.
If only part of the background was selected, you can either increase the Tolerance setting and try again, or hold down the Shift key while clicking on another part of the background with the Magic Wand. This will add to the first selection you made. Note the small “+” that appears next to the Magic Wand when holding down the Shift key, signifying that areas are being added to the selection.
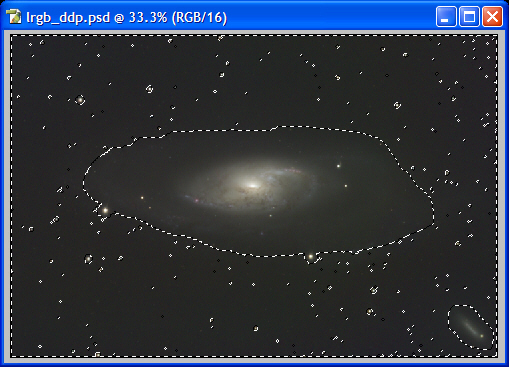
When you are finished selecting the background, you should see something like this:
Note that the faint edges of the main galaxy were selected. We don’t want GradientXTerminator to flatten these parts, so we need to deselect them. The easiest way to do this is using the Lasso tool again. Choose it, and hold down the Alt key to remove the edges of the galaxy from selection. Note the small “-” that appears next to the lasso to indicate areas are being removed from selection.

You should now see something roughly like this:
Now we’re ready to run GradientXTerminator again. Invoke it, and set the Detail to Fine, and the Aggressiveness to High. You should get the following:
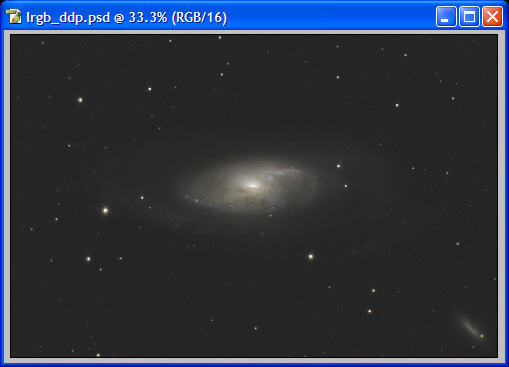
That’s it! The gradients are gone, and the background is a perfect neutral tone. You are now ready to do any final layering and adjustments to the image.
For more complete instructions on running GradientXTerminator, check out the manual below.
Manual
Image requirements & workflow
GradientXTerminator works on RGB and Grayscale images, in 8-, 16-, or 32-bit mode, although results are best if it is used on 16- or 32-bit images.
Gradient removal can be done at any point in the post-processing workflow, but should general be done after pre-processing steps such as calibration and integration. It is important to do proper flat-field correction in pre-processing. While GradientXTerminator can correct for some degree of flat-fielding errors, it is not a substitute for this important calibration step. See “Correcting for Vignetting” below for more details.
Basics
GradientXTerminator works by using the selected portions of an image to estimate the background gradients. A mathematical model is constructed based on these portions of the image. Think of this process as bending a “rubber sheet” so that it follows the brightness gradients in the background, but not the brightness of the objects in the image. This model allows the plug-in to estimate the pixel values of the background gradient in the unselected portions of the image, including parts of the image with brighter foreground objects such as galaxies, nebulas, and star clusters.
How well GradientXTerminator corrects for the background gradients in an image depends mainly on the accuracy of the input you give it. Fortunately, the rich set of selection tools in Photoshop make selecting the background easy.
Background Selection
There are at least three approaches that work well for selecting the background of an image:
Lasso Tool
Using Photoshop’s Lasso tool, you can approach background selection in a sort of a backwards fashion. Rather than trying to lasso all of the background areas of an image, you can first select all of the foreground (object) areas, and then invert the selection. See the tutorial for an example of this.
Magic Wand
The Magic Wand tool, if set up properly, is very effective at selecting background regions while including very little if any object areas. The key setting for the Magic Wand is “Tolerance.” This controls how wide a range of pixel values the tool will consider equivalent to the part of the image you click on. A larger tolerance means more of the image will be included. A small tolerance means less will be included.
Generally, a value of between 5 and 10 works well for the Magic Wand’s tolerance. If you find that the current setting tends to select too much object in addition to background, try lowering the tolerance value. If only part of the background gets selected, try raising the value.
As shown in the tutorial, you can also use the Shift and Alt keys with the Magic Wand. Holding down Shift while clicking on the image with the Magic Wand will cause the area you click on to be added to the selection. Holding down Alt, on the other hand, will cause the area to be removed from the selection.
Select Color Range
This function is accessed in Photoshop using the menu: Select->Color Range. If you have invoked this, you will notice that the cursor turns into a little eyedropper if you pass it over the image. Click on an area of the background. You will notice that much of the image background area in the Color Range dialog box turns white. Adjust the “fuzziness” slider to include more or less of the background as desired. This is analogous to the Tolerance setting of the Magic Wand tool. Try clicking on other parts of the image background with the eyedropper to get the selection you want. Then click OK to select it.
Sometimes, a combination of selection methods is appropriate. See the tutorial for an example of using the Magic Wand in combination with the Lasso tool. With a little practice, you should be able to select the appropriate parts of an image very quickly.
Detail
To extract the background gradient information, GradientXTerminator divides the image into a grid. The fineness of this grid is controlled by the Detail setting. A higher level of detail results in a finer grid.
Which setting to use depends upon the gradients present in your image. A large-scale, slowly varying gradient, such as a linear gradient from light pollution, is easily modeled mathematically and so only needs a coarse grid setting. A more complex gradient, such as that caused by vignetting in the optical system (when not corrected by a flat field calibration), might need a medium detail setting to properly correct. The fine setting would be used for gradients that vary over short distances in the image. Slight imperfections in flat-field calibrations can sometimes cause subtle gradients that are well-corrected using the fine setting.
One trade-off with the detail setting is that the filter will take longer to run with a finer setting; the more grid points there are, the harder it is mathematically to figure out how the rubber sheet bends to conform to them. Also, during the background extraction process, the plug-in has a much easier time of rejecting stars or faint background objects that might be inadvertently selected when the detail setting is on a coarser value.
| Detail Settings | ||
 |  |  |
| Coarse | Medium | Fine |
Strength
The Strength setting determines how closely GradientXTerminator follows the extracted background information during the correction process.
Imagine the mathematical model of the background gradient as a sort of rubber sheet that is allowed to bend and flex to fit the gradient information. The Strength setting conrols the stiffness of this imaginary rubber sheet. A low strength is analogous to a very stiff sheet of hard rubber; it can’t bend very much to follow small-scale variations in the background level. This setting is appropriate for large-scale gradients that don’t have much detail to them, such as linear or near-linear light pollution gradients that span all or most of the image.
A high strength is equivalent to a very flexible sheet of rubber, and can follow small variations in the background level. This is appropriate for final correction of subtle, small-scale gradients.
The higher the strength, the more careful you must be in selecting the background area. If you inadvertently select the faint halo of a galaxy, for example, a high strength setting will likely flatten it right out. Use a low strength setting for your initial large-scale gradient correction, and then a higher setting later if more accurate correction is needed.
Balancing the Background Color
The “Balance background color” checkbox tells GradientXTerminator to adjust each color channel so that the background is an even neutral (grey) tone. This is done on the whole image, after gradient correction has been done. In other words, the background is neutralized by adding or subtracting a constant value to every pixel in the image. This is done for each color channel in the image.
This can be an extremely helpful feature, and should normally be left on for color images. Many images suffer from a color balance problem that can be traced to a background color imbalance. The background balance can be hard to spot, as your attention is probably on the color of the foreground objects. If you correct the background balance, you will probably find it much easier to correct the color of the foreground object.
Checking the Background
Both before and after running GradientXTerminator on an image it can be very helpful to temporarily boost up the background level. This allows you to see any gradients that might be tough to spot otherwise, and also to check how well GradientXTerminator did. Invoke Photoshop’s Levels dialog (Image->Adjust->Levels), make sure the Preview checkbox is selected, and slide the midpoint slider to the left while watching the image. Click Cancel to make sure you don’t actually apply this change to the image.
Multiple Passes
The best way to handle tough gradient situations is to do multiple passes. First, correct the large-scale gradients using a coarse or medium Detail setting, and a low or medium Strength setting. Then correct the smaller-scale gradients using a medium or fine Detail setting and a medium or high Strength. Remember to do a more accurate job selecting the background when using higher Strength settings.
Correcting for Vignetting
Although GradientXTerminator can easily correct for vignetting in an image, it is more optimum to do so with standard flat-field calibration. The reason is that vignetting is a multiplicative error, which is to say that the vignetted pixels are effectively multiplied by a value that depends on where the pixel is in the image. Pixels further away from the center of the image are multiplied by smaller values, making them dimmer. This is different from gradients caused by light pollution, which are additive in nature. That is, the gradient is caused by light pollution adding values to pixels depending on their position in the image. This is what GradientXTerminator assumes has happened when it is processing an image.
Another way to think about this is that vignetting effectively reduces the sensitivity of the affected pixels, whereas a gradient effectively adds a position-dependent bias to the pixel values.
Flat-field calibration measures and corrects for the vignetting of the optical system, among other things. When a flat is correctly applied, it is divided into the image, properly correcting for the multiplicative errors of vignetting.